Planning on getting some gear from Japan.
Came across Rakuten and I am going to test them out.
Tenso is used to ship from Japan to Overseas.
Some heads up info on Tenso:
https://www.tenso.com/en/guide/contraband/index.html
We do not accept Cash on Delivery or Pay Later packages.
When shopping on online stores, please makre sure you do not choose cash on delivery or after payment.
Make sure that you pay by credit card in advance.
Please make sure to add your membership number to the end of the shipping address.
When shopping, please make sure that your membership number (beginning with TS) is at the end of your shipping address.
This number is how we know this package is yours.
Friday, June 24, 2011

Thursday, June 23, 2011
Speaker install - Z27AG Door Front


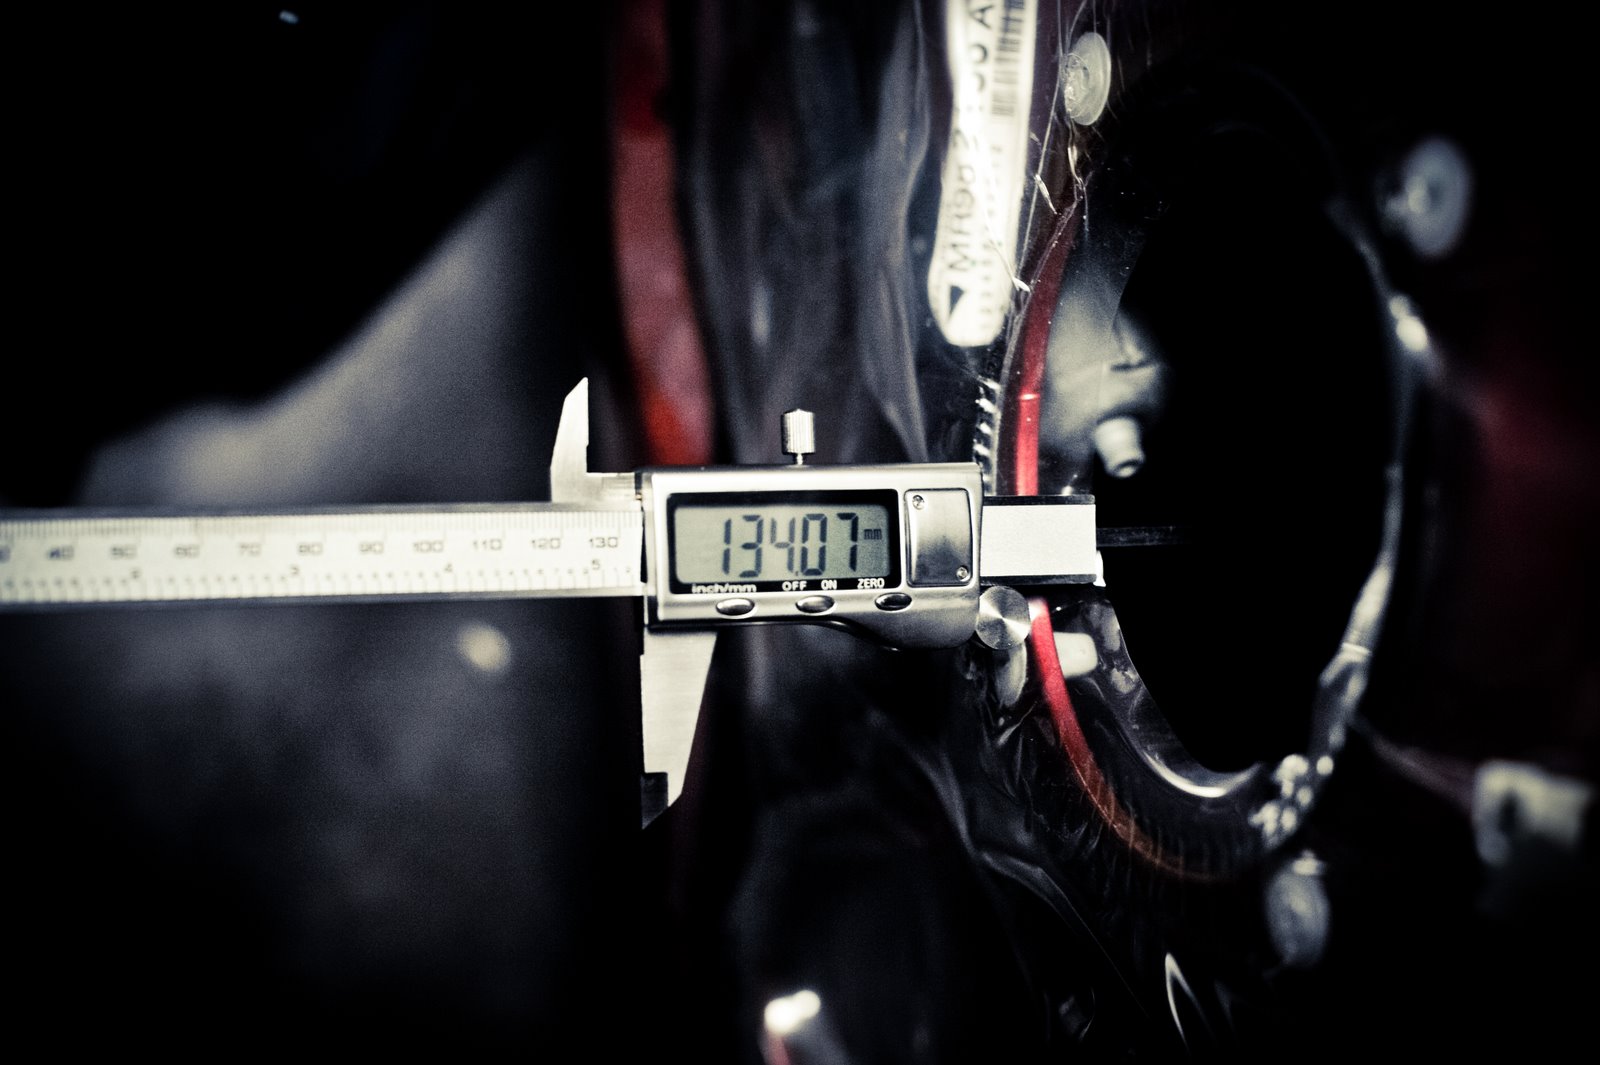
Remove the door card see here
Speaker install on the door. I think they were 4" drivers. Be careful not to use deep speakers otherwise it hits the glass.

Use mdf to make a spacer adapter.

installed

the cross over i double taped and zip tied to the bottom of the door so the glass doesn't interfere.
Wednesday, June 22, 2011
Sway Bar/Stabilizer Link RnD Z27AG
 When rotating my wheels I found the sway bar linkage rubber on the front suspension lower arm was worn out. I done about 75,000km and don't really have a garage. Car is kept out in the weather.
Got a quote from Mitsubishi (if the douche gave me the right thing), a new sway bar linkage was $54AUD
I have a feeling he didn't give me the right part info. I lost my patience with him.
Done some research on JDM garages and found that my fav garage offers a replacement http://www.rsrs.jp/
Pity it is over $400AUD for just the rubbers @_@
Hence me plan to pull off the linkage and take it down to a local suspension centre to get some Nothalane (brand of Urathane bushes) if possible.

Pulled apart the work book to find any info i might need.
- First image is torque requirements
- 2nd image linkage location
- 3rd image is torque values

and the below 4th image is removal and installations instructions for the front sway bar or stabilizer bar which i plan to replace soon with a Cusco unit.

Sunday, June 19, 2011
June 19 - Track Day
Overall results can be seen here http://www.clubracer.net.au/
I had a 25sec split from the fastest car. I am not sure how the classing works. I get pushed into class B though due to the 1.7x factor on a 1499cc car. In the same class at a GT3 @_@
My mate in the Evo X had a 20sec split. My first lap was the quickest. Very strange.
Only other FWD that i knew of was the XR4


I had a 25sec split from the fastest car. I am not sure how the classing works. I get pushed into class B though due to the 1.7x factor on a 1499cc car. In the same class at a GT3 @_@
My mate in the Evo X had a 20sec split. My first lap was the quickest. Very strange.
Only other FWD that i knew of was the XR4


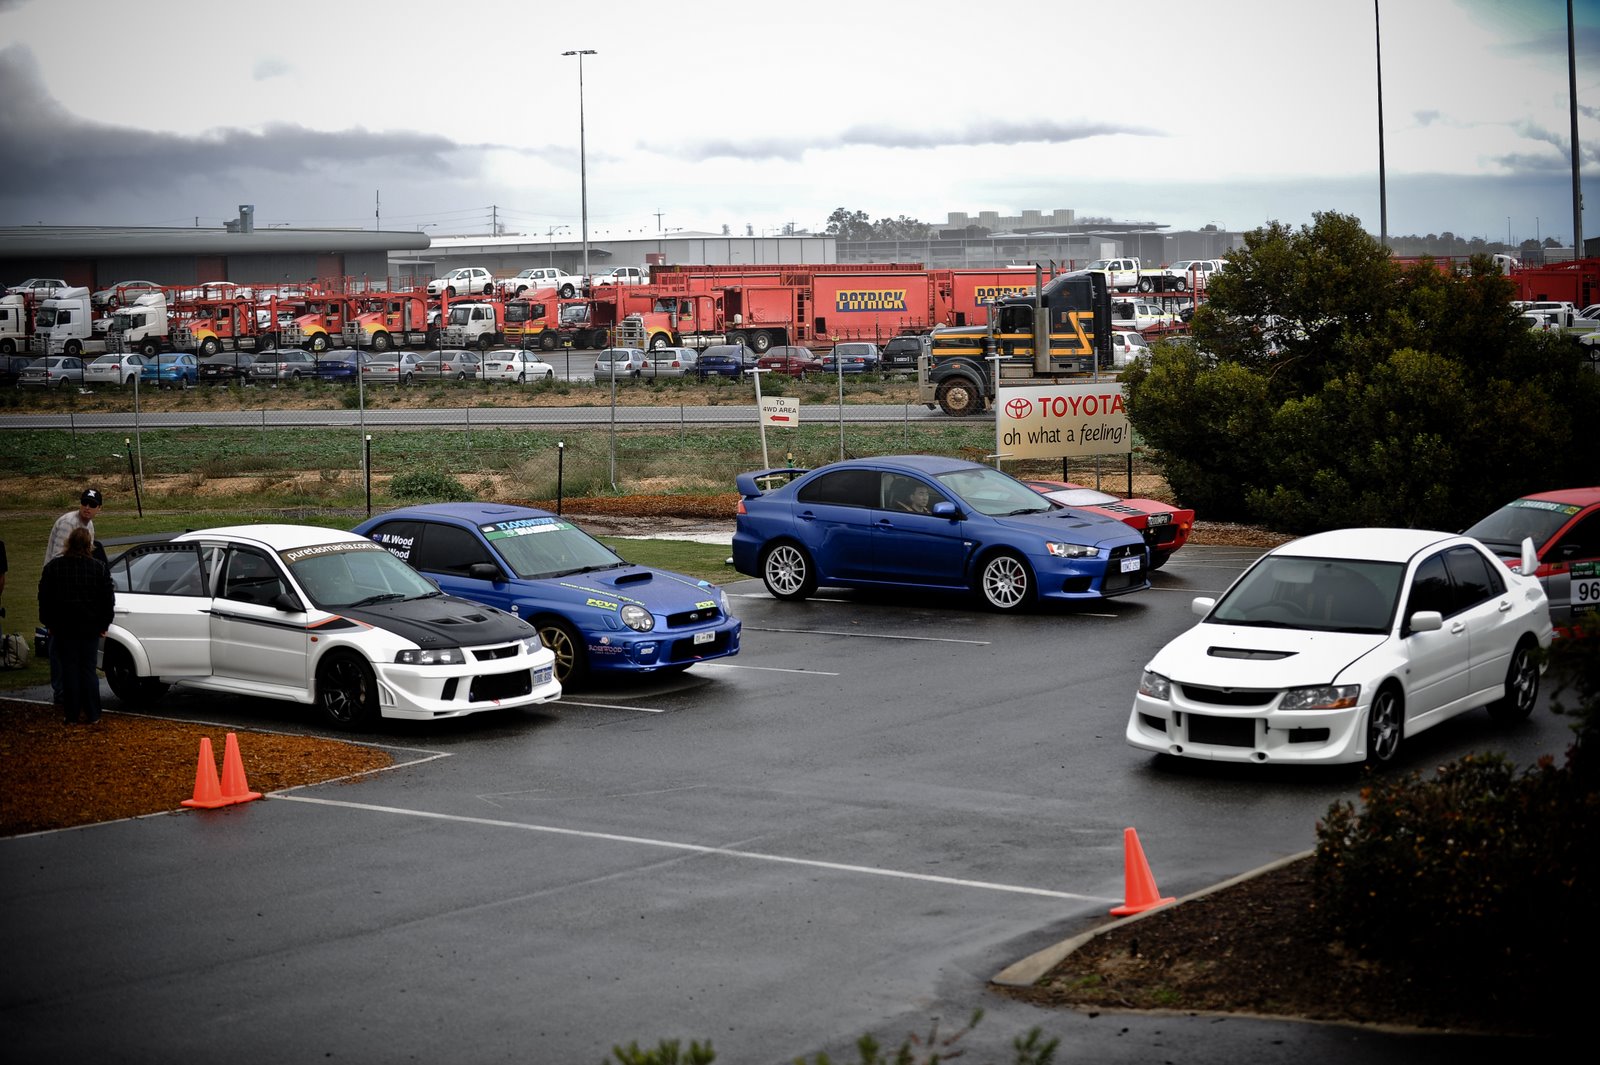
MC Motorsport - State Sprint Championship - RAC - June 19th
First time at the RAC MC Motorsports challenge. Managed a best lap of 173s and my mate in the Evo done a 167s. The track was wet, it rained a couple of times.
My laps went 173/187/178/214
My Mate done 171/187/167/188
Had about 32 cars. I went harder on lap 3 but the times didn't improve @_@ dont know why. Maybe lack of traction.


My laps went 173/187/178/214
My Mate done 171/187/167/188
Had about 32 cars. I went harder on lap 3 but the times didn't improve @_@ dont know why. Maybe lack of traction.



Thursday, June 9, 2011
JDM Garages for Z27AG
Compiling another list of garages that do work for the little Colt.
One garage that I have a few pieces from is YR-Advance http://www.yr-advance.com/
--- Saw on there blog http://minkara.carview.co.jp/userid/692351/blog/c546038/ ---
They went on circuit and reported some temperatures:
Best Lap: 47 sec 9
Probably there was about 25 degrees outside temperature.
Peak Oil temperature: 118 degrees
Peak temperature: 98 degrees
MT peak oil temperature: 88 degrees
MT is the way the oil temperature, 68 degrees in one hour continuous operation speed
Pass on the road, less than 60 degrees
The town does not take that it was 50 degrees.
The temperature should be adequate cooling without doing OK I think.
Other shops i like are:
R's Racing Service http://rsrs.jp/ - Planning some parts from them at the moment
Colt Speed http://www.colt-speed.com/
Full Blast BFM http://www.bfm-fullblast.ecnet.jp/products/colt/index.html
Sard http://www.sard.co.jp/ (they have some exhaust parts and aluminum radiator + breather tank)
Race Queens!!!!!!!!!!!!!!!
http://sucre-rq.com/
http://ameblo.jp/narushimamomoka/#
http://minkara.carview.co.jp/userid/742072/blog/
One garage that I have a few pieces from is YR-Advance http://www.yr-advance.com/
--- Saw on there blog http://minkara.carview.co.jp/userid/692351/blog/c546038/ ---
They went on circuit and reported some temperatures:
I went to Honjo Circuit http://minkara.carview.co.jp/userid/692351/blog/20631483/
Introducing a little data
Best Lap: 47 sec 9
Probably there was about 25 degrees outside temperature.
Peak Oil temperature: 118 degrees
Peak temperature: 98 degrees
MT peak oil temperature: 88 degrees
MT is the way the oil temperature, 68 degrees in one hour continuous operation speed
Pass on the road, less than 60 degrees
The town does not take that it was 50 degrees.
The temperature should be adequate cooling without doing OK I think.
Other shops i like are:
R's Racing Service http://rsrs.jp/ - Planning some parts from them at the moment
Colt Speed http://www.colt-speed.com/
Full Blast BFM http://www.bfm-fullblast.ecnet.jp/products/colt/index.html
Sard http://www.sard.co.jp/ (they have some exhaust parts and aluminum radiator + breather tank)
Race Queens!!!!!!!!!!!!!!!
http://sucre-rq.com/
http://ameblo.jp/narushimamomoka/#
http://minkara.carview.co.jp/userid/742072/blog/
Monday, June 6, 2011
195fwkw 1.5LT Z27AG Colt :)
 Couple photo at a Ford meet. Couple Colts came down. Jemz 195 fwkw out of a stock motor. GT2860RS with a .64 housing I think. By WTFAuto.
Running an Adaptronic ECU, 440CC Injectors, TBE and upgraded fuel pump and fuel reg.

Some incredible welds by WTFAuto

Monday, May 30, 2011
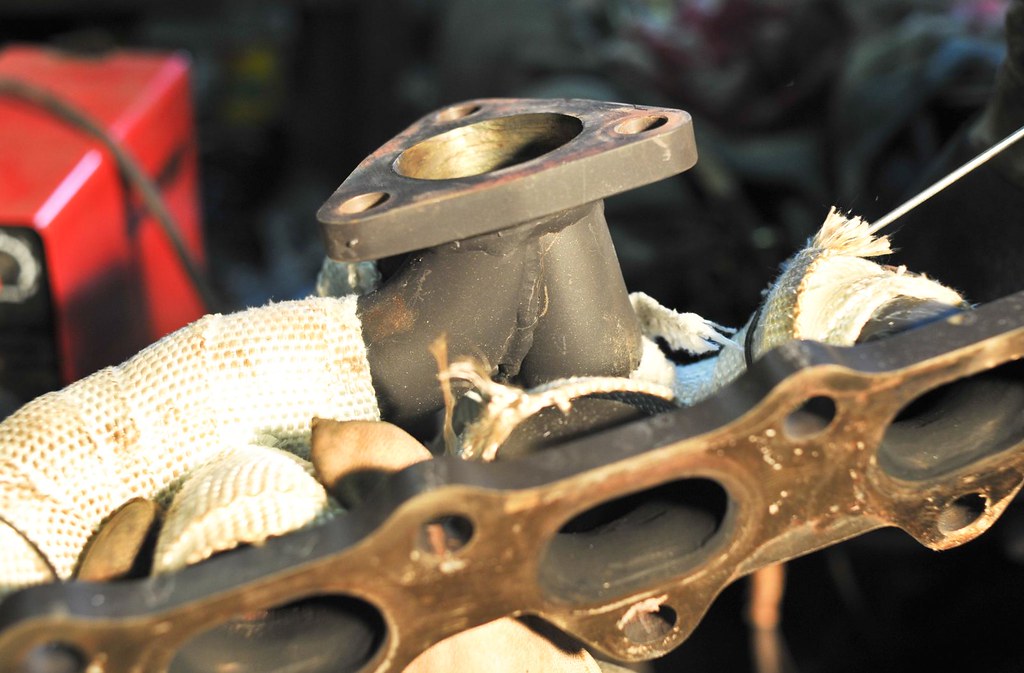
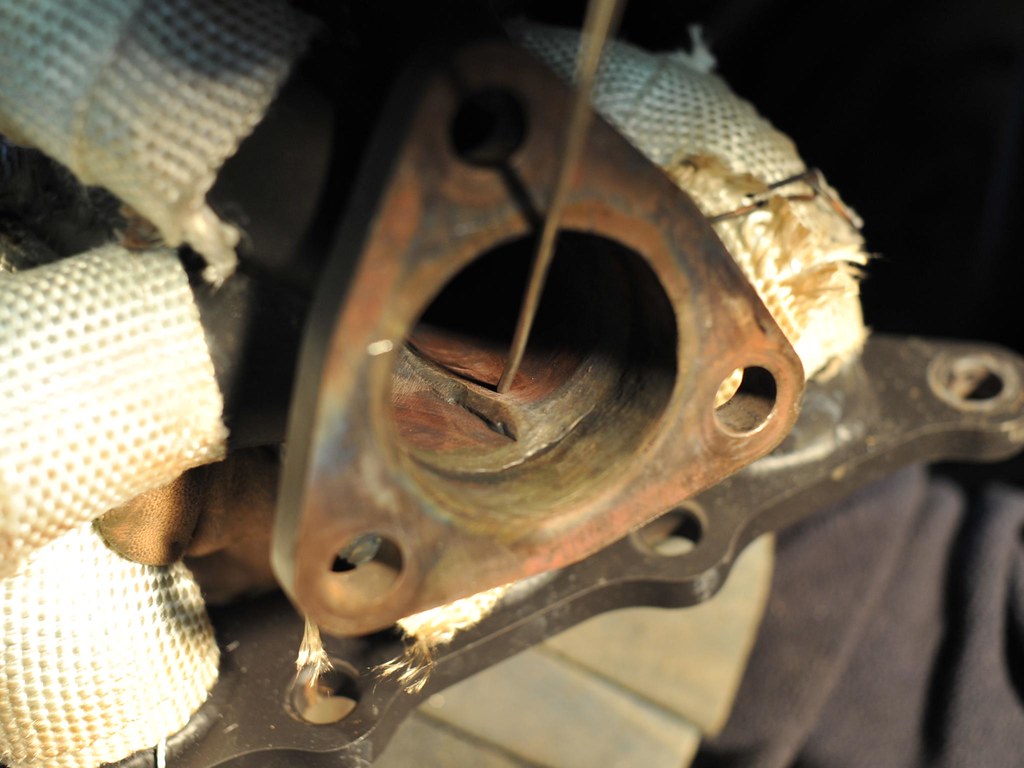
Autobahn88 Manifold Cracked
 Thought i add info from my cracked mani...
Some of the feedback i got:
shit weld.... No edge prep at all, only one weld bead with minimal penetration....
If you get it welded up yoself ur gunna have to get the turbo mating flange ground to get it flat again. Have you got the stockie lying around?
MAF - PN MR985187
I put some info on the forums a while back. Thought I consolidate all the info.
killed my MAF...prob to much boost i dunno no...
but going through lots of evo X forums its extremely common to fail...
was wondering if any1 here besides mat has killed there maf...
typical way to no is a crazy idle...low idle on cold startup 1k and high idle when warm 2kish
then if u reboot the car reset maf signal it will drop from the high idle to 1k idle...and run a tad richer
it some kind of safe limp map in stock ecu
below is a list of cars wit our maf...you can get luck and find em on ebay between 100-200ish
u can get rebuilt ones for under 200...or local wreckers for ??
below is 2 lists...one is from a website
* 2006, 2007 and 2008 Mitsubishi Eclipse (2.4L and 3.8L)
* 2004, 2005, 2006, 2007 and 2008 Mitsubishi Endeavor
* 2004, 2005, 2006, 2007, 2008 and 2009 Mitsubishi Galant
* 2004, 2005 and 2006 Mitsubishi Lancer (excluding Evolution 2.4L)
* 2008 Mitsubishi Lancer
* 2004, 2005, 2006, 2007 and 2008 Mitsubishi Outlander
Part number is MR985187
from evo X forums
MITSUBISHI ECLIPSE GS(2006 - 2009)
MITSUBISHI ECLIPSE GT(2006 - 2009)
MITSUBISHI ECLIPSE GT-P 2008
MITSUBISHI ECLIPSE SE 2008
MITSUBISHI ECLIPSE SPYDER GS(2007 - 2009)
MITSUBISHI ECLIPSE SPYDER GT(2007 - 2009)
MITSUBISHI ECLIPSE SPYDER GT-P 2008
MITSUBISHI ENDEAVOR 2004
MITSUBISHI ENDEAVOR LIMITED(2005 - 2006)
MITSUBISHI ENDEAVOR LS(2005 - 2008)
MITSUBISHI ENDEAVOR SE(2007 - 2008)
MITSUBISHI ENDEAVOR XLS 2005
MITSUBISHI GALANT 2004
MITSUBISHI GALANT DE(2005 - 2008)
MITSUBISHI GALANT ES(2005 - 2009)
MITSUBISHI GALANT GTS(2005 - 2007)
MITSUBISHI GALANT LS(2005 - 2006)
MITSUBISHI GALANT RALLIART(2007 - 2009)
MITSUBISHI GALANT SPORT EDITION 2009
MITSUBISHI GALANT SPORT V6 2009
MITSUBISHI LANCER DE(2008 - 2009)
MITSUBISHI LANCER ES(2008 - 2009)
MITSUBISHI LANCER EVOLUTION GSR 2008
MITSUBISHI LANCER EVOLUTION MR 2008
MITSUBISHI LANCER GTS(2008 - 2009)
MITSUBISHI LANCER RALLIART(2004 - 2009)
MITSUBISHI LANCER SPORTBACK 2004
MITSUBISHI OUTLANDER 2004
MITSUBISHI OUTLANDER ES(2007 - 2009)
MITSUBISHI OUTLANDER LIMITED(2005 - 2006)
MITSUBISHI OUTLANDER LS(2005 - 2008)
MITSUBISHI OUTLANDER SE(2006 - 2009)
MITSUBISHI OUTLANDER XLS(2005 - 2009)
killed my MAF...prob to much boost i dunno no...
but going through lots of evo X forums its extremely common to fail...
was wondering if any1 here besides mat has killed there maf...
typical way to no is a crazy idle...low idle on cold startup 1k and high idle when warm 2kish
then if u reboot the car reset maf signal it will drop from the high idle to 1k idle...and run a tad richer
it some kind of safe limp map in stock ecu
below is a list of cars wit our maf...you can get luck and find em on ebay between 100-200ish
u can get rebuilt ones for under 200...or local wreckers for ??
below is 2 lists...one is from a website
* 2006, 2007 and 2008 Mitsubishi Eclipse (2.4L and 3.8L)
* 2004, 2005, 2006, 2007 and 2008 Mitsubishi Endeavor
* 2004, 2005, 2006, 2007, 2008 and 2009 Mitsubishi Galant
* 2004, 2005 and 2006 Mitsubishi Lancer (excluding Evolution 2.4L)
* 2008 Mitsubishi Lancer
* 2004, 2005, 2006, 2007 and 2008 Mitsubishi Outlander
Part number is MR985187
from evo X forums
MITSUBISHI ECLIPSE GS(2006 - 2009)
MITSUBISHI ECLIPSE GT(2006 - 2009)
MITSUBISHI ECLIPSE GT-P 2008
MITSUBISHI ECLIPSE SE 2008
MITSUBISHI ECLIPSE SPYDER GS(2007 - 2009)
MITSUBISHI ECLIPSE SPYDER GT(2007 - 2009)
MITSUBISHI ECLIPSE SPYDER GT-P 2008
MITSUBISHI ENDEAVOR 2004
MITSUBISHI ENDEAVOR LIMITED(2005 - 2006)
MITSUBISHI ENDEAVOR LS(2005 - 2008)
MITSUBISHI ENDEAVOR SE(2007 - 2008)
MITSUBISHI ENDEAVOR XLS 2005
MITSUBISHI GALANT 2004
MITSUBISHI GALANT DE(2005 - 2008)
MITSUBISHI GALANT ES(2005 - 2009)
MITSUBISHI GALANT GTS(2005 - 2007)
MITSUBISHI GALANT LS(2005 - 2006)
MITSUBISHI GALANT RALLIART(2007 - 2009)
MITSUBISHI GALANT SPORT EDITION 2009
MITSUBISHI GALANT SPORT V6 2009
MITSUBISHI LANCER DE(2008 - 2009)
MITSUBISHI LANCER ES(2008 - 2009)
MITSUBISHI LANCER EVOLUTION GSR 2008
MITSUBISHI LANCER EVOLUTION MR 2008
MITSUBISHI LANCER GTS(2008 - 2009)
MITSUBISHI LANCER RALLIART(2004 - 2009)
MITSUBISHI LANCER SPORTBACK 2004
MITSUBISHI OUTLANDER 2004
MITSUBISHI OUTLANDER ES(2007 - 2009)
MITSUBISHI OUTLANDER LIMITED(2005 - 2006)
MITSUBISHI OUTLANDER LS(2005 - 2008)
MITSUBISHI OUTLANDER SE(2006 - 2009)
MITSUBISHI OUTLANDER XLS(2005 - 2009)
----
got a maf from a triton new model...for $150
had a few thousand km on the clock
looks to be all workin and idlin fine
Saturday, May 28, 2011
Track Day - No Limits 26th May
 Went down to Barbs for the last time before winter hits.
My goal was to hit 1:05 and lower. I knew it was possible.
Last time on the track the new rubber was really waxy.
I got my wish:
me n my Federal 595 street series rubber 1:03.4292
 my mate and his stock rubber evo X ran a 1:01.9572
Plan to hit a 1:01 with a new clutch, i have slip in 2nd gear.
Possibly might try a stronger pad. I use a A1RM at the moment.
Might try a Carbotech or something for my Evo III twin pots.
Photos from http://www.kamimages.com.au/


Tuesday, May 24, 2011
Teaching Myself Engines - Fact Finding Mission
Building my own engine. I am going to attempt to build my own engine.
Going to need to do alot of reading, sourcing parts and gettings more cool tools.
Build Parts I will require:
- new rods and studs
- new pistons + rings
- new larger cams
- valves and springs
- new mains studs + head studs
- timing belt
- water pump
- seal kit - head gasket, main seals
- new bearings (big end, crank saddles)
Will need to consider machine work by Perth companies:
- crank machine and balance
- decking the block to make sure they are perfectly flat
- block hone
- hot tanked?
- piston/bore coatings? http://www.cicceramic.com.au/
- head porting
Tools:
- snap/telescopic gauge - measure IDs
- dial bore gauge
- valve spring compressor
- stretch gauge
- ring compressor
- ring expander pliers
- dial indicator (measure crank end play)
Precise Measurements:
- piston to wall clearance therefore: measurements of cylinder bores and piston heads
- measure the crank main bores - snap gauge or dial bore gauge
- crank main journals + main bearings
- crank cradle bolted down with plasti gauge - compare results to crank main journal measurements (measured with snap gauge etc)
- rod caps on and torquing to spec, measure the bore diameter
- rod to crank clearances: Rod race diameter minus bearing thickness X 2 + rod journal diameter
- plasti gauged the rod bearings. Install the clean bearings in the rod and rod cap. Bolt them to the crank with a piece of plasti gauge and torque to spec
- ring gap
Other Details:
- 3 step torquing process following the factory pattern - when doing head bolts/main caps/cam caps/cam covers etc
- cleaned the bearing mating surfaces on the rod and rod cap
- ARP moly lub on the rod bolts
- use motor oil to coat cyclinder bores and the piston
- use some scrap fuel holes to put on the rod bolts to stop them scratching cylinder bores and rod journels
- clean all surfaces throughly where bearing and thrust bearing sit
- when installing any bolts coat them with engine oil, helps them stretch to spec when torquing
- assembly lube on crank jounals and bearing faces.
- install one of the retainer clips in the piston. A little assembly lube on the wrist pins and the rods to allow the pin to slide through the piston and rod easier. After the
wrist pin was in the piston rod combo install the second retainer clip
- full floating wrist pin in the aftermarket rod and piston head VS pressed in wrist pins
- The rod bolts I torque with a stretch gauge
- some info from an engine builder I got:
##make sure its someone that can read Wiseco's instructions, and measure the pistons correctly. It is done wrong more often than not. Also, do not let them go stupid on the piston to bore clearance, most old school V8 engine builders are off with the fairies when it comes to piston to bore clearance. Wiseco recommend 3-3.5 thou which is more than adequate for any 4G15 build 150-600hp.
##Yeah, there's nothing difficult about gapping the rings, its just time consuming.
Ring orientation is specified within the instructions from Wiseco with the ring kits provided.
The only other thing is checking all clearances accurately.
##Depends on the brand of camshaft, but generally, you need to run a new cam in for 15mins or so, at approx 2000rpm.
- when measuring piston head: You want to record the largest OD on the thrust axis, not the pin axis
- To set the ring end gaps you need to square the rings in the bore to ensure that you are measuring the end gaps accurately. In most cases you can use the piston itself and line the deck up with the 3rd ring land to ensure its square in the bore. Then use a feeler gauge to measure end gap.
- fine metal file in a vice will suffice. Make sure movements are pushing the ring towards the file, not pulling away. Once end gap is set remember to use a fine whetstone to deburr the edges of the rings or they WILL damage the bores and ring lands. I also go a little bit further and use an Arkansas stone to polish the ends.
-prime the engine with oil before starting
Links:
- http://www.angel-works.co.uk/articles/f4rbuild.php
Going to need to do alot of reading, sourcing parts and gettings more cool tools.
Build Parts I will require:
- new rods and studs
- new pistons + rings
- new larger cams
- valves and springs
- new mains studs + head studs
- timing belt
- water pump
- seal kit - head gasket, main seals
- new bearings (big end, crank saddles)
Will need to consider machine work by Perth companies:
- crank machine and balance
- decking the block to make sure they are perfectly flat
- block hone
- hot tanked?
- piston/bore coatings? http://www.cicceramic.com.au/
- head porting
Tools:
- snap/telescopic gauge - measure IDs
- dial bore gauge
- valve spring compressor
- stretch gauge
- ring compressor
- ring expander pliers
- dial indicator (measure crank end play)
Precise Measurements:
- piston to wall clearance therefore: measurements of cylinder bores and piston heads
- measure the crank main bores - snap gauge or dial bore gauge
- crank main journals + main bearings
- crank cradle bolted down with plasti gauge - compare results to crank main journal measurements (measured with snap gauge etc)
- rod caps on and torquing to spec, measure the bore diameter
- rod to crank clearances: Rod race diameter minus bearing thickness X 2 + rod journal diameter
- plasti gauged the rod bearings. Install the clean bearings in the rod and rod cap. Bolt them to the crank with a piece of plasti gauge and torque to spec
- ring gap
Other Details:
- 3 step torquing process following the factory pattern - when doing head bolts/main caps/cam caps/cam covers etc
- cleaned the bearing mating surfaces on the rod and rod cap
- ARP moly lub on the rod bolts
- use motor oil to coat cyclinder bores and the piston
- use some scrap fuel holes to put on the rod bolts to stop them scratching cylinder bores and rod journels
- clean all surfaces throughly where bearing and thrust bearing sit
- when installing any bolts coat them with engine oil, helps them stretch to spec when torquing
- assembly lube on crank jounals and bearing faces.
- install one of the retainer clips in the piston. A little assembly lube on the wrist pins and the rods to allow the pin to slide through the piston and rod easier. After the
wrist pin was in the piston rod combo install the second retainer clip
- full floating wrist pin in the aftermarket rod and piston head VS pressed in wrist pins
- The rod bolts I torque with a stretch gauge
- some info from an engine builder I got:
##make sure its someone that can read Wiseco's instructions, and measure the pistons correctly. It is done wrong more often than not. Also, do not let them go stupid on the piston to bore clearance, most old school V8 engine builders are off with the fairies when it comes to piston to bore clearance. Wiseco recommend 3-3.5 thou which is more than adequate for any 4G15 build 150-600hp.
##Yeah, there's nothing difficult about gapping the rings, its just time consuming.
Ring orientation is specified within the instructions from Wiseco with the ring kits provided.
The only other thing is checking all clearances accurately.
##Depends on the brand of camshaft, but generally, you need to run a new cam in for 15mins or so, at approx 2000rpm.
- when measuring piston head: You want to record the largest OD on the thrust axis, not the pin axis
- To set the ring end gaps you need to square the rings in the bore to ensure that you are measuring the end gaps accurately. In most cases you can use the piston itself and line the deck up with the 3rd ring land to ensure its square in the bore. Then use a feeler gauge to measure end gap.
- fine metal file in a vice will suffice. Make sure movements are pushing the ring towards the file, not pulling away. Once end gap is set remember to use a fine whetstone to deburr the edges of the rings or they WILL damage the bores and ring lands. I also go a little bit further and use an Arkansas stone to polish the ends.
-prime the engine with oil before starting
Links:
- http://www.angel-works.co.uk/articles/f4rbuild.php
Thursday, May 19, 2011
Clutch Options
So these guys DO make a clutch for us http://catalogue.xtremeclutch.com.au/catalogue.htm
Part Number KMI22015DSBHD
K = Kit
MI - Mitsubishi
22 = Outside Diameter code (cm)
015 = Sequence number
DSB = Disk Style
Part Number KMI22015DSBHD
K = Kit
MI - Mitsubishi
22 = Outside Diameter code (cm)
015 = Sequence number
DSB = Disk Style
DSB
Dampened Centre, solid coupling riveted to centre, sintered buttons riveted to coupling.
Offers very positive engagement designed for heavy-duty street or off road motor sport use.
Dampened Centre, solid coupling riveted to centre, sintered buttons riveted to coupling.
Offers very positive engagement designed for heavy-duty street or off road motor sport use.
HD = Cover Style
Whats it got?
Details : with DSB Disc and Heavy Duty Cover
Specifications : Clamp Load = 700Kg (40% inc.)
DSBHD
HD Pressure plate combined with Sprung Button disc
* Very positive operation
* Designed for mild track use
Xtreme Xtra Heavy Duty Clutch Covers are engineered specifically to perform in Xtreme Street or Sprint conditions. The driveability is decreased due to increased pedal effort and style of clutch discs, however this minor compromise is overweighed by the Xtreme performance of the clutch. These clutches are offered to the higher modified vehicles that require a greater capacity but do not require a multi plate clutch.
Details : with DSB Disc and Heavy Duty Cover
Specifications : Clamp Load = 700Kg (40% inc.)
DSBHD
HD Pressure plate combined with Sprung Button disc
* Very positive operation
* Designed for mild track use
Xtreme Xtra Heavy Duty Clutch Covers are engineered specifically to perform in Xtreme Street or Sprint conditions. The driveability is decreased due to increased pedal effort and style of clutch discs, however this minor compromise is overweighed by the Xtreme performance of the clutch. These clutches are offered to the higher modified vehicles that require a greater capacity but do not require a multi plate clutch.
Optional Part:
CSC Bearing Assembly Part Number CSCMI003
Details : Combined hydraulic slave cylinder and thrust bearing assembly
---------
CSC Bearing Assembly Part Number CSCMI003
Details : Combined hydraulic slave cylinder and thrust bearing assembly
---------
Some of the prices in found from 2010
More inofrmation gathered from Mitsubishi - now with clutch part numbers:
Friction pl8: 2301A085 (trade $249+gst)
Pressure Pl8: MN196047 (trade $307+gst)
Thrust bearing: 2960A042 (trade $172+gst)
Friction pl8: 2301A085 (trade $249+gst)
Pressure Pl8: MN196047 (trade $307+gst)
Thrust bearing: 2960A042 (trade $172+gst)
All up: $800.80 incl gst (retail is $920)
Extreme (Adelaide Clutch Services) 6 button sprung ceramic clutch kit
Pressure and Friction pl8 kit: KMI220015DSBHD $504.50 incl gst
Release Module: ATFM103 $282.28 incl gst
This price is direct from Extreme.
Pressure and Friction pl8 kit: KMI220015DSBHD $504.50 incl gst
Release Module: ATFM103 $282.28 incl gst
This price is direct from Extreme.
---------
Autoclutch is Ossi Park Perth is recommended by alot of people. But I haven't had much luck, they been busy.
Thinking of buying direct from over East.
I believe the Sachs number is 3082 000 590, from a Mitsubishi Smart.
Sachs Standard Replacement Clutch for Mitsubishi Colt CZT, Ralliart and Smart Brabus ForFour.
http://www.htecelite.com/
http://www.htecelite.com/
Wednesday, May 4, 2011
No Limits April - Results
 Both my mate and I are running stock rubber. Mine were brand new.
Think I was on a super lap till the car in front came off :(
Aim for next time is sub 1:04
Car is strong enough, its just the driver.

No Limits April
 Couple photos of my mates Evo X on the track...Was our first time...But he owned me...
I blame it on my new tires and running the car at about 80%
Clutch is on the way out @_@
mates brakes glowing hotz


cold hearted killer!
Friday, April 22, 2011
Oil Catch Can
 As you can see its not really a catch can @_@ I thought i try something different so I install an ebay oil/water air separator used in a compressor.
I don't know if it will work I am waiting to collect some oil ^_^
I used brass fitting to connect some hoses to PCV outlet 13mm to the intake inlet 19mm.
I accidently bought some super expensive hoses @_@ $20 each...I got up-saled!

You dont need such an expensive hose...
The separator was $14 on ebay and the brass fitting set me about around $20.
I believe i can do it cheaper...with a different fittin
Subscribe to:
Posts (Atom)