I believe this is a good read for the people still getting there hands around a car. A good little maintenance tip. From changing brakes, engine oil, coolant flush, brake bleeds and gearbox oil. Will pretty much cover all the small things faced in owning a car.
Then when you get serious a timing belt change.
For more info on the gearbox and clutches and LSD try here
/removing-gearbox-installation-tips-for.html
--------------------------------------------
NOTE:
DO not remove gearbox drain bolt until you can remove the filler bolt
DO not work under a car that isn't supported
DO not exceed GL-4. The synchro's are not designed to have a material that reduces friction beyond that spec, so any GL 4/5 will lead to premature hub/slider wear. From memory is the suphurs that damage the syncros.
--------------------------------------------
Tips from me:
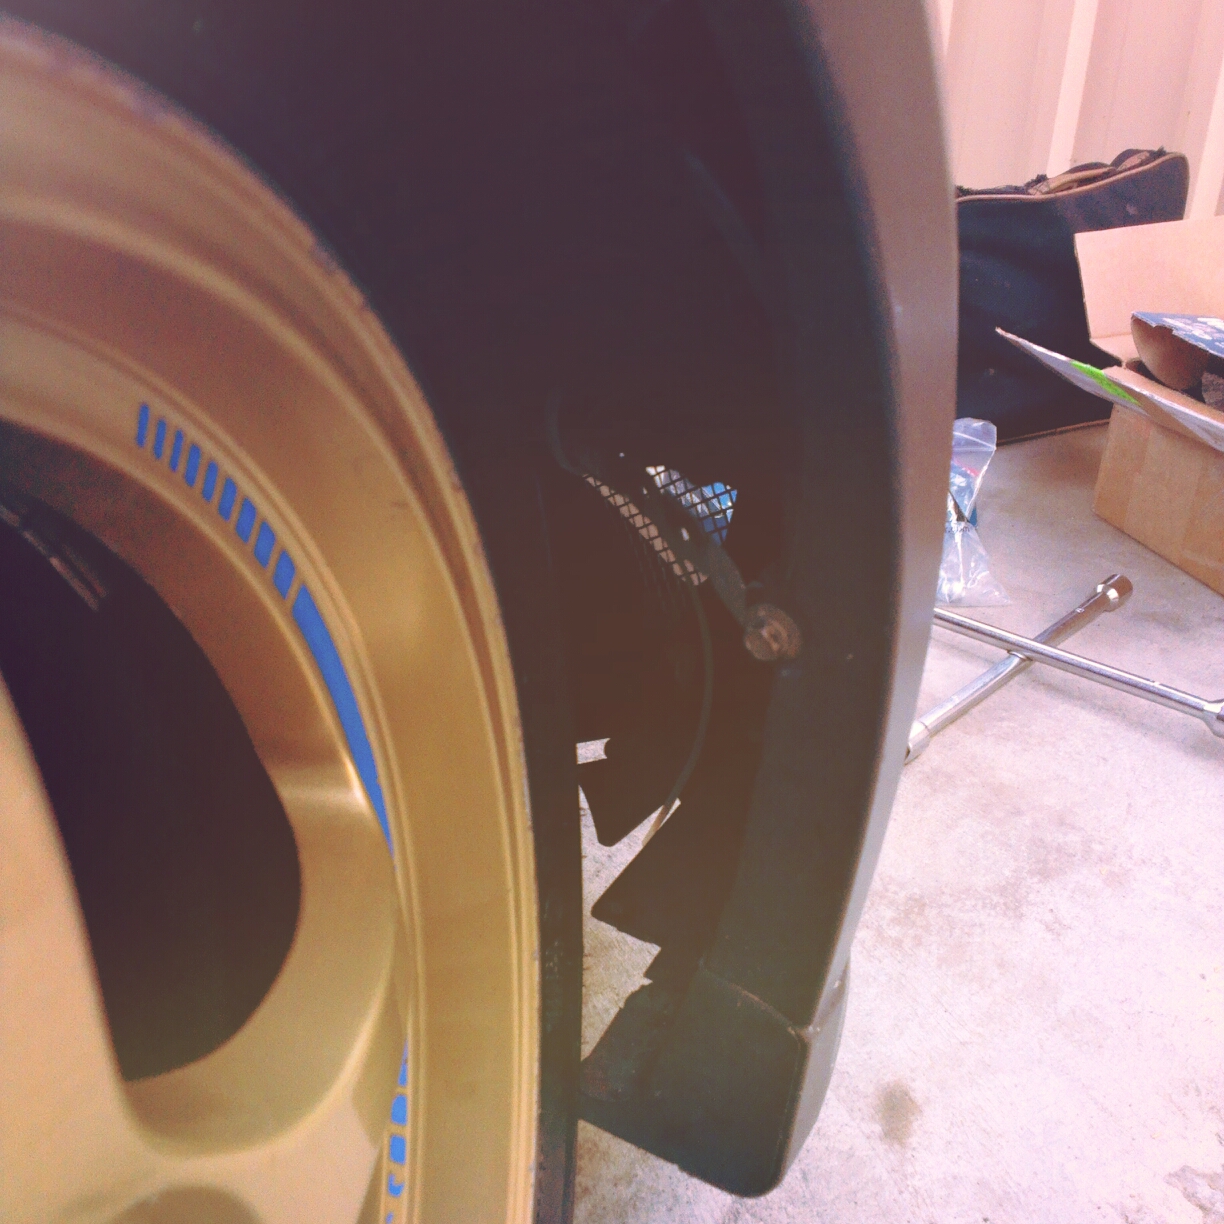
- I don't remove wheels or anything off the engine bay items, I get right under the car and use an 8mm hex bit on the end of a ring spanner. I couldn't get clearance for anything else.
- let the fluid settle, run through the gears and try top it up again.
- easier to fill the car while it is on 4 stands, hence a level car.
- EVEN EASIER IF YOU DO the overfill kit listed below
- Spray the bolt with WD40
- if it doesn't come out cold, try doing it after a short drive
- one gearbox I worked on wouldn't come out. With the gearbox out of the car, it took some brute strength. They all give way, some just take longer.
- Make sure it is a good quality hex bit e.g. kinchrome. You don't want to round off the sump bolts.
- Nothing wrong with over filling. I usually go 2lts. There is a breather port at the top of the gearbox if you are worried about foaming.
- I NO LONGER USE Redline due to the fluid going waxy after a 1000km or so.
- RoyalPurple, Amsoil or Neo Racing are my recommended option.
- Nothing wrong with over filling. I usually go 2lts. There is a breather port at the top of the gearbox if you are worried about foaming.
- I NO LONGER USE Redline due to the fluid going waxy after a 1000km or so.
- RoyalPurple, Amsoil or Neo Racing are my recommended option.
--------------------------------------------
Distributed with his permission - Sure mate by all means feel free to use! your blog has been very helpful for me!

Since I had a bitch of a time changing my gearbox oil, figured I'd write up a short thread as there's bits and pieces of info here and there but nothing definitive on how to do it.
It seriously helps if you have a pair of helping hands, pain in the ass if its a solo job ( but manageable none the less).

A magnetic drain plug. Handy for those worried about metal or run a clutch type LSD
This is the oil i am using. I have also used royal purple.
/gearbox-drop-part-4-axles.html
DISCLAIMER: I hold no responsibility if you round the bolts, snap something, get oil in your eyes, lose an arm, have the car fall on you etc. Use common sense!
Stuff needed
1. 2L of Gearbox oil. Pick whatever you want as long as its 75W-90 GL4.
2. 8mm Allen Key (Quality one will be better as a crap one will round and bend)
3. 8mm Socket and extension
4. Jack and handle ( will need handle as a breaker bar )
5. Jackstand
 6. WD40
7. Pump or a funnel and some tubing.
8. Socket set to undo wheel nuts
9. Eye protection
Before we start, theres bits and pieces of info out there about doing it different ways. The below steps are easy enough that anyone with common sense should be able to tackle it.
Step 1
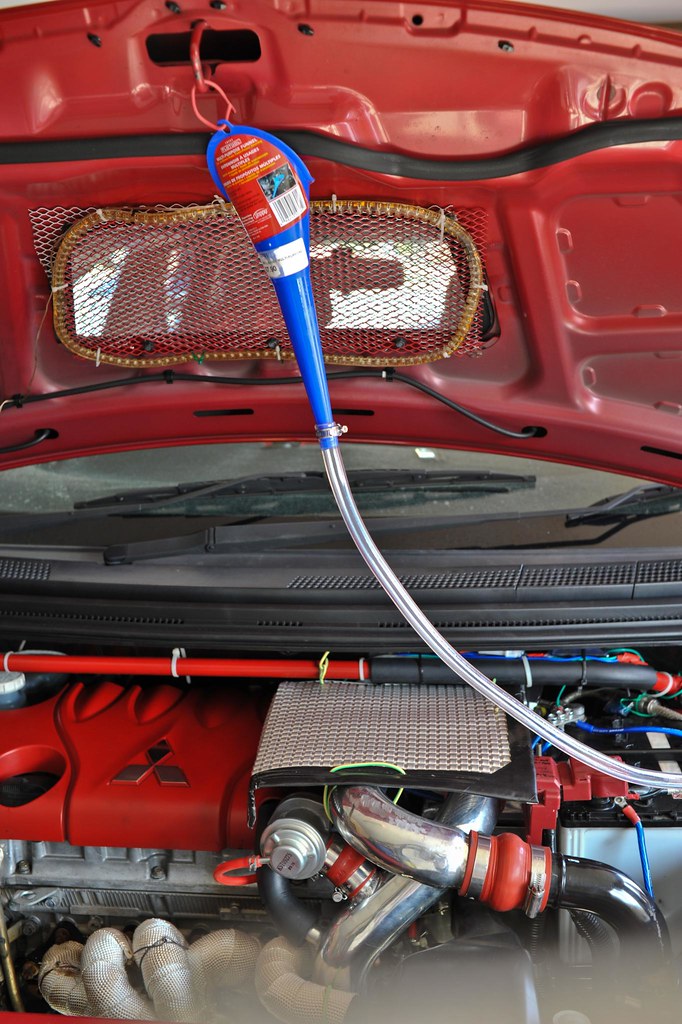
 - remove top intercooler piping, battery, airbox and snorkel (leave airbox-turbo intake pipe intact)
- unbolt 3 bolts holding battery tray in place
- squeeze the little clip holding the negative terminal and MAF cable to release them from the battery tray.
Okay, so now with all the above removed. You should have a nice emptyish view of the top of the gearbox, also should be able to wiggle the battery tray up and down to give you some room to move in the next few steps.
Step 2
- Undo wheel on front passenger side.
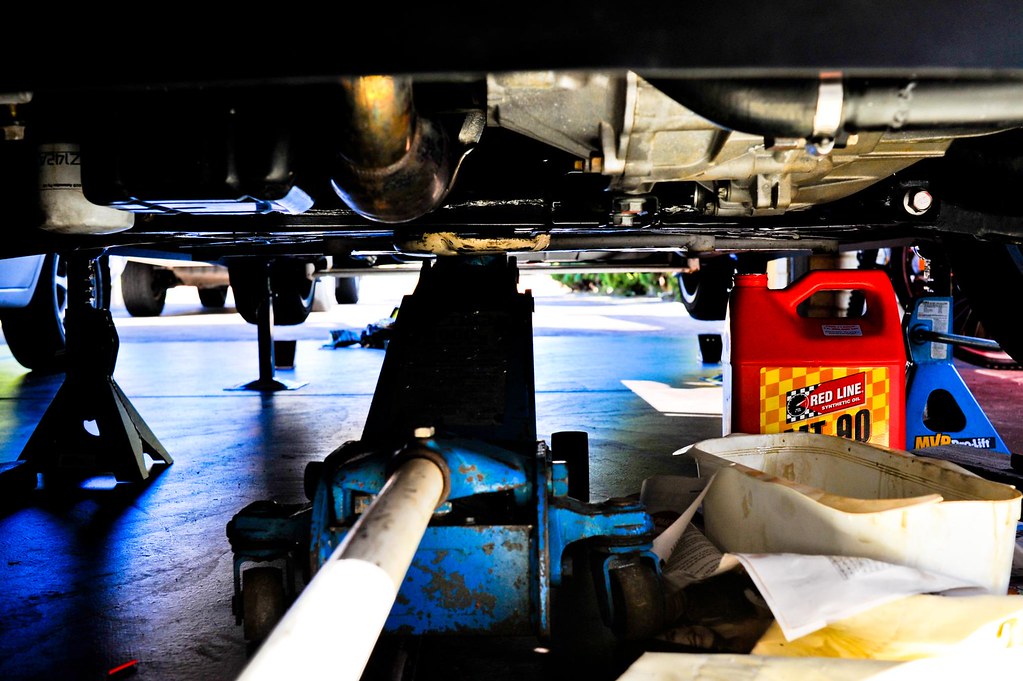
- Jack up the car and place jack stands under chassis frame rail.
- Leave Jack there as well holding some load for double protection.
Now its safe to work under the car. Get under and look for the 8mm fill bolt on the gear box, it will be right next to the drive shaft and sway bar. WD40 the bolt for good measure.

Step 3
- place one end of the 8mm allen key into the bolt with the long end point straight up.
- now look through the engine bay from the top and you should see the allen key pointing up straight at you
 - slip the jack handle over the end of the key and slowly pull towards you (Will take a good amount of force and it should come loose). This is the hardest step in the entire process, make sure the allen key is seated in the bolt fully and persist, it will come loose. helps if you have another set of hands holding the key in while the other person cranks it at the top. Note: wiggle the battery tray towards you so you dont crack it while trying to crack the bolt.
- undo the drain bolt from under the car. This one is a lot easier, same process but instead of using the jack handle for leverage. Just slip a 8mm socket and extension on the end of the allen key and break the bolt.
Step 4
 - Get a pan and drain out all the old oil, hopefully its not black and smells of ass. Once drained redo the drain bolt.
- Either use a pump to get the new stuff in or use a funnel and tubing to gravity feed it in. Pump is much more preferable. Best position to pump is from the front passenger wheel arch for the easiest access.
NOTE: You can either put the wheel back on to level out the car when refilling to get the factory 1.75L OR you can leave the car jacked up and pump a little more in. I chose the latter option and pumped 2L in.
- once full, do up the fill bolt and presto your done! Now just reinstall everything in the engine bay, clean up any spills and you are good to go.
Rather long guide, but its a slut of a job and I wished I had something like this when I was tackling it.
PS: if you plan on changing oil regularly, would make a lot of sense to replace those hex bolts with normal M18x1.5 bolts. Which I am contemplating on doing, credit to Ayu452 for the sizing of the bolt. /home-brew-overfill-kit.html
Sales people got confused, apparently in providing the items i used. General names include:
1)
M18x1/4 BSP (which is a generic sensor adapter)
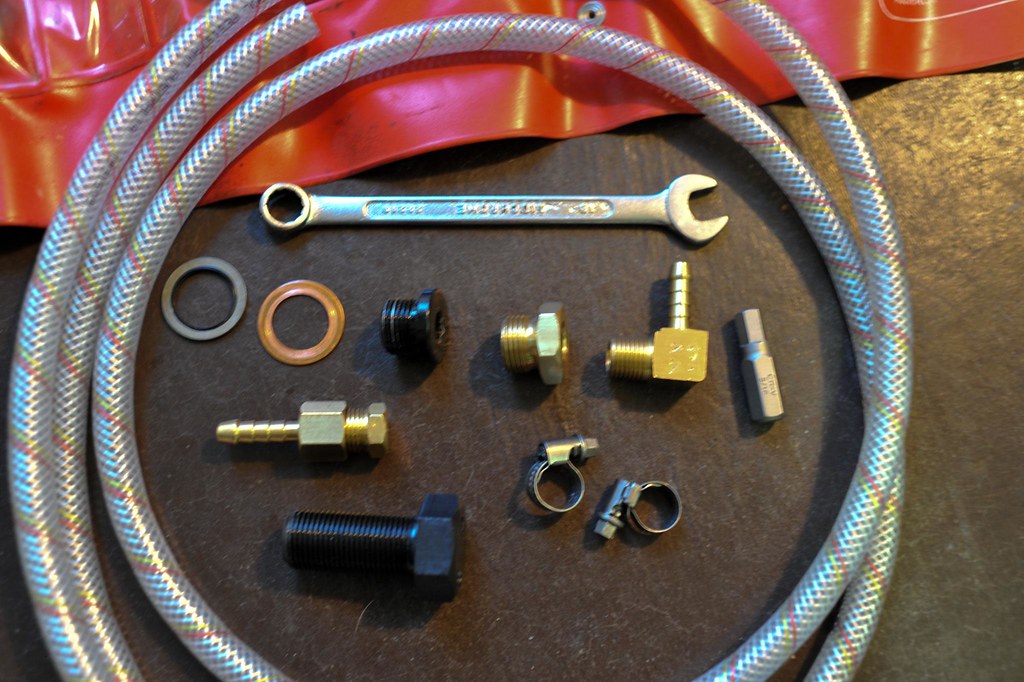 e.g. Brass adapter bush, suits threaded port in the turbo outlet pipe for Australian DTS, MTQ & Safari systems with threaded Metric M18 x 1.5.
2)
Barbed Brass Fitting - No P6 Male Elbow - 1/4 x 1/4 (Hose x BSPT)
Code: 06006-0404
- used to create the right angle in the sensor adapter
3)
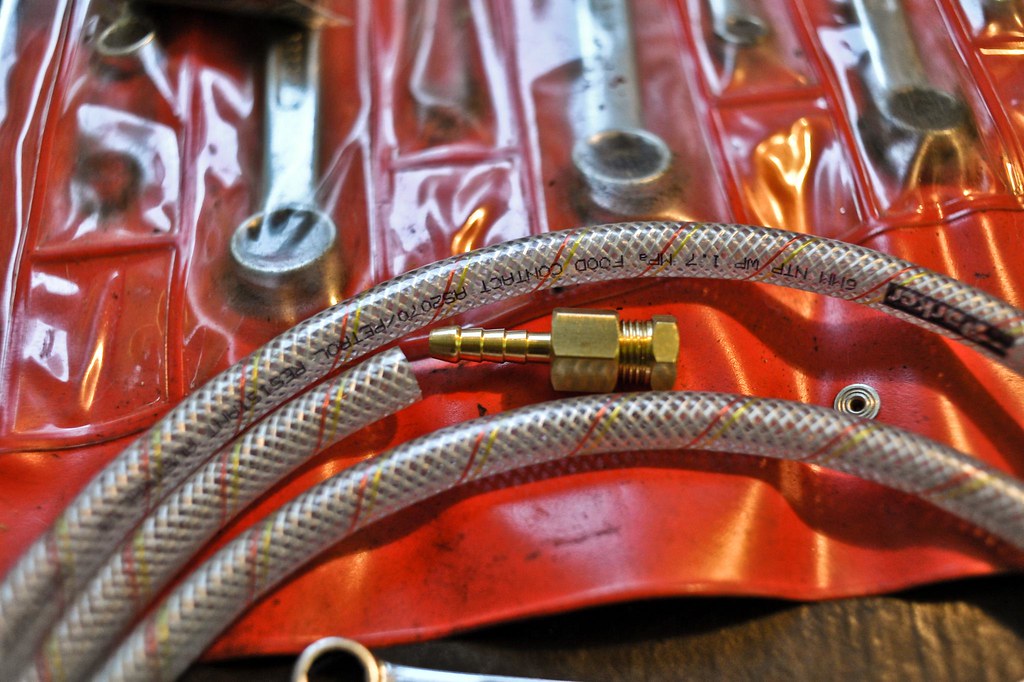 Barbed Brass Fitting - No P10 Female Tailpiece - 1/4 x 1/4 (Hose x BSPT)
Code: 06010-0404
- used to block the end of the open hose that runs into the engine bay
4)
1/4 BSP Taper plug
- used to close the end of (3)
I use 6mm hose with hose clamps. The hose has an outer cover, with some electrical conduit. I didn't have any issues with heat, it was more so protection from rubbing or getting pinched.
**Part numbers from TubeFit. They were found on my Enzed receipt.
-------------------------- Handy Engine Oil Change Tap --------------------------
It can also be used on the gearbox. But I use a magnetic plug. Also i feel it will stop the gearbox from emptying fully.


Also note: This little item is super handy for those doing there oil changes. A simple little tap.
No mess :)
/fumoto-f106n-14mm-15.html