Wednesday, August 24, 2011

Install of the Swaybar linkage - Custom OEM 4056A054


http://ayu452.blogspot.com/2011/08/shift-linkage-bushes.html
http://ayu452.blogspot.com/2011/06/sway-barstabilizer-link-rnd-z27ag.html


Mitsubishi sells each pair - P# 4056A054


http://minkara.carview.co.jp/

http://ayu452.blogspot.com/2011/08/gearbox-drop-part-7-broken-gear-linkage.html


http://autospeed.com/cms/title_Custom-Bushes/A_112233/article.html


For the OEM bush -
~15.5mm height
~28mm OD
~8mm ID

Solid Shifter Linkage and Custom Swaybar Linkages

Got a fabricator to custom make me a solid shifter bush and trim some sway bar linkage rubbers and insert a crush tube.
Bought some universal sway bar linkage rubbers. Trimmed 3mm off the thicker end and got a crush tube 8mm ID and 10mm OD to get pressed into them. I noticed the stock ones were tearing. Hence the crush tube.


How to get at and install them:
http://ayu452.blogspot.com/2011/06/sway-barstabilizer-link-rnd-z27ag.html
The original rubbers i bought:
http://ayu452.blogspot.com/2011/08/gearbox-drop-part-8-morning-shopping.html


Trimmed away 3mm because the stock swaybar linkage rubber uses a flared edge/recess where the washer goes into.

12mm camber bolts in the background


The original pressed in rubber grommet shell. The original grommet isn't solid and uses an air pocket to cushion the shifting.
Apparently was a bitch! to get out.
And cut the ball stud caps out of the older rubber to put it in the new one

Monday, August 22, 2011

Z27AG Evo Twin Pot Pads n Rotors P2

17mm bolt holding the caliper on. I put new slide pin grease only a couple months ago. Dam expensive grease. But I did check it, still golden. 3 track days later.
The DBA 4000 series rotor uses a painted centre, hopefully it does rust out...unlike the RDA cheaper ones.


Looks like i did the brake pads last year July http://ayu452.blogspot.com/2010/07/z27ag-brake-service.html

These pads are in much better condition than the EBC ones.


Run-in instructions for the pads


DBA install tips and instructions


DBA 4402SL according to the box.
used on a 6/92-1/93 Mitsubishi Galant AWD - Turbo - Front (so i found)
bought through Todd/runuts. top bloke. provides more info than u can digest and happy to help. as ebay says 5 stars :)
From DBA:
MITSUBISHI > LANCER EVO > I
MITSUBISHI > LANCER EVO > II
MITSUBISHI > LANCER EVO > III
MITSUBISHI > GALANT > HH5 VR4 Turbo
MITSUBISHI > GALANT > AWD Turbo (USA)

I think in the 5000series they are DBA DBA-402X fits?
1993 Mitsubishi Galant
1992 Mitsubishi Galant
I think it is just a 4000 Series with a gold hat. Not a 2 piece like the 5000 series.
Hence compatible models with the evo calipers on the Z27AG
DBA402X Street Series Gold (cross-drilled & slotted) 276 x 24
DBA402SL Street Series Slotted Left-Hand 276 x 24
DBA402SR Street Series Slotted Right-Hand 276 x 24

According to forum postS:
stock rotors are 25.8mm width and minimum thickness is 24mm - Diameter of stock rotors are 256mm DBA2226
RDA 24mm width discs

Hyundai option, which is spot on in terms of the diameter, and max-min thicknesses


It looks like the Evo III casting is a 4304 and the VR4 is a 2207 & 2311. I use the 2311 casting on my car, as it doesn't use a banjo bolt brake line fitting i believe it is a VR4/Magna etc caliper and not a Evo III.
In theory it will have a smaller piston be 1-2mm, which i have yet to confirm.

Year            Description                       Bracket # Casting # Pad #
GALANT
6/90-1992 VR4 AWD / AWS Turbo 2207 2207 D-530

ECLIPSE
1993-94 AWD Turbo  2-Piston       2207      2207 D-530
1995-1999 AWD Turbo                  2207        4304   D-530

3000GT
1991-99 2WD  2-Piston                      2207 2311 D-530

DIAMANTE
1991-96 2-Piston                              2207 2311 D-530


Z27AG Evo Twin Pot Pads n Rotors P1

So while pulling out the clutch i noticed i had shot through my old RDA rotors. Think it has been just under 2 years ago i added them. approx. 40,000km later, 1 skim and about 4 or 5 track days.
They stood up to a green stuff ebc pad and a A1RM pad.
I have now bought Carbotech XP8 to test out. Have only heard great things. Double the price of the A1RM.
EBC green were demolished. They over heated and cracked up. View my early posts.


http://ayu452.blogspot.com/2010/07/z27ag-brake-service.html
Actually I can't remember if I did two sets of A1RM @_@

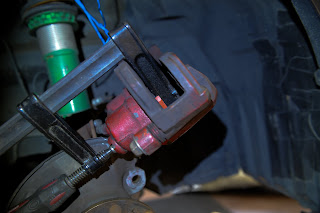
Standard clamp to push the piston back. Master cylinder almost made it...but it over flowed @_@.
My car is on really high standard at the front.


The new running gear :) Can't wait for barbs. 60sec run?


Bit of anti squeal. A red sticky glue that goes onto the brake pad/caliper shim.


Saturday, August 20, 2011

Z27AG Paint Job - Experiment

Wanted to paint the interior trims red like the JDM Rcolt. The speedo is red.
Started with a light sanding about about 4 light coats of metallic red. Color was closer then I had imagined.
According to a forum post i read, the interior trims are the same color as the red Z27AG. So, it worked out pretty sweet they matched :)


First coat in the sun light


About 2/3 coats in.


Ran out of paint, but about 3 coats and 1 hour dry time. It might darken more. But pretty happy with it.
Might add a clear coat on top?


Tuesday, August 16, 2011

Shift Linkage Bushes


Gearbox torque specs from a Jap LSD install manual


Needed to pull it out. One of the bushes are stuffed. Place in Perth should hopefully rebuild it @_@
Checked out flexible drive agencies in welshpool. They make custom cables. No luck
Checked out Polyrubber, nice guys but still no go
Mitsubishi quoted $255 for the cables (set). Better price than i expected
Think i going down the machinist route for about $70. Solid bush or something similar
Another shop i have been recommended is http://www.apt-polyurethane.com.au/

Window Tint 20grade B4 and After

While the car wasn't mobile a friend of a friend came to do some 20 grade tint. I believe the darkest legal tint available. I only got the fronts done and the front A pillar window


A pillar not done, passenger window in progress


A pillar not done, passenger window in progress


Civic 08 before hand


Civic 08 after. Should darken when glue sets


Door skin is held on by 10 or so clips around the outer edge and 2 screws. One in door handle and one in door arm rest.
Once skin is removed window skirt can be pulled out

Gearbox Drop Part 9 - In You GO!

Beefed up stock clutch. Uses a new chro molloy pressure plate, same diaphram and outer cover.

i am using a kevlar clutch material,  more expensive than ceramic. but it came recommend for spirited track and a daily driver

below is photos of a clutch alignment tool that trys to centre it withint the clutch cover.
takes a bit of practice to get use to the config of it


i haven't driven yet but i have tested the clutch pedal. feels the same as stock.
can't check engagement though, no starter motor or exhaust yet.
clutch cover bolts i believe were 23NM, I also used high temp loctite. and do them up in an opposing pattern. slowly bringing up to torque spec

Clutch Mechanics


Additional Info:
i sent my oem to get modified.
oem was from Kenobi - around $450-500AUD
then another ~$400 or so to get it modified, this was all done via Extreme. I posted it over to SA - Gavin
all up it took a couple weeks.
I went a Kevlar disc over ceramic. I believe i am the only with this? hence it costed a bit more for RnD
Read about Kevlar here: Kevlar Disc
He was still in development of the lightened flywheel... As of mid 2012 he now has a lightweight flywheel.
Bonalume does a lightweight kit but you must use there clutch as well.

No idea what a Kevlar kit off the shelf costs. I do still have my OEM clutch disc, if anyone wants to reuse it with a rebuilt cover...
OR i can probably get my old cover rebuilt and add the new clutch disc to it...but you will have to reuse your old throw out bearing/clutch fork...mine was in pretty good nick...it did get cleaned and re-greased when i did the DiY LSD install.

Additional Weight Info:
Stock Clutch Assy = 12kg
Stock Flywheel  = 6.7kg

Lightened Clutch Assy by ColtSpeed = 9kg
Lightened Flywheel by ColtSpeed = 4.6kg

By ColtSpeed Clutch

Crimping pressure -> 143%
Torque clutch design  -> 150%
Corresponding torque (catalog value) 21.4Kgfm  -> 32.0Kgfm -> 150%
Clutch pedal depressing force -> 123%


Some info i got from the Colt Speed Clutch
※ Notice of Work Please read the instructions that come with working before. And contains an important announcement. The excerpt shown attached below the important part is at the same time please do the following genuine replacement.

Starting from Genuine Parts required (Please do not think durability reuse) flywheel bolts ·

Genuine part Md008839 [Flywheel Bolts (M12 x 26mm)] @ ¥ 230 (tax) number five must release bearing
· ASSY (including Hawk) 2960A042 [clutch release module] Genuine Part @ ¥ 6, 850 (excluding tax) quantity 1
• Drive shaft oil seal genuine Part Number 2960A032 [oil seal diff case] @ ¥ 2,400 (tax) number 2 must
· Farukuramu (plastic pivots) 2960A031 [FULCRUM,CLUTCH RELEASE FORK] Genuine part @ ¥ 1,050 (tax) number one need

5 Part Numbers Include:
MD008839 Flywheel bolt - Five - ¥ 230
2960A042 Release bearing ASSY - One - ¥ 6,850
2960A032 Drive shaft oil seal - Two - ¥ 2,400
2960A031 Fulcrum (pivot) - One - ¥ 1,050


However i didn't replace my flywheel bolts @_@

Gearbox Drop Part 8 - Morning Shopping Run ^_^

Bought some new parts. Swaylink bushes i think they were 2 or 4 bucks each. Trying to replicate what R's Racing Garage in Japan provide. Our bushes are unique in that the ID is 8mm and the OD is ??
I can't remember. But anyways the typical universal bush of ID 8mm will have a small OD.

Had to get a new air compressor hose $55 from Enzed


And the bush with the correct OD will have a larger ID (10mm). Which is what i bought and plan to modify with a insert.
I always got the universal 12mm camber bolts. 65AUD a pair.

Had to get the flywheel machined, $45AUD
By CBA in Malaga.
CBA - Clutch & Brake Australia. Western Australia. 20 Oxleigh Dr. Malaga WA 6090


Pretty! Get the flywheel ground now lathe.
Need to use loctite on the flywheel bolts. Torque was 123NM.
I put all 5 in and then take one out at a time and add loctite.
Slowly increase torque on each bolt, do opposite bolts.


i put loctite on the last threads then use my finger to run it into the threads


Sunday, August 14, 2011

Gearbox Drop Part 7 - Broken Gear Linkage Cable Rubber @_@


Empty engine bag :)
And my broken rubber linkage. Can this be replaced?
Any one know? Rather than the entire linkage cable.

Todd, recommended some DSM shifter bearings...Trying to figure out how to attach them when the shifter link looks like a lightbulb??? Any ideas


Gearbox Drop Part 6 - Clutch Fork Install

Used a rattle gun to remove the flywheel bolts


No oil on the oil seal behind the flywheel :D

Flywheel in bad nik


New clutch fork and pivot. Used some grease on the pivot and the slide.
Requires a female torx bit to remove the fork.
I noticed the grease had a lot of dust in it. Must of picked it up from the burning clutch