Thursday, March 29, 2012

RColt Gets Gate - Turbosmart CompGate Z27AG - Comp-Gate 40


My test fit. FARK YEH! Sweet alignment 

 The pipe - steam pipe ^_^


Finally in goes the TD04 and external gate. To be completely tweaked and tuned and ready to race. Can't wait to get the spool down.

Comp-Gate 40:
PART NUMBER PART DESCRIPTION
TS-0505-3001 WG40 Inlet weld flange
TS-0505-3002 WG40 Outlet weld flange
TS-0505-3003 WG40 Valve seat
TS-0505-3004 WG40 Inlet V-Band
TS-0505-3005 WG40 Outlet V-Band
TS-0505-3006 WG38/40/45 Diaphragm assembly
TS-0505-3007 76mm Locking collar
TS-0505-3008 76mm Collar tool
TS-0505-3009 1/16TH NPT - 6mm barb vacuum fittings
TS-0505-2007 1/16TH NPT - 1/8 NPT Female fittings
TS-0505-2008 1/16TH NPT - -3AN Flare fittings
TS-0505-2009 1/16TH NPT - -4AN Flare fittings

Spring Refer to Chart

PSI BAR  KPa
16   1.1     110        - 5 Inner + 11 Middle + 0 Outter
17   1.17   117.2 - 0 Inner + 7 Middle + 10 Outter
19   1.31   131      - 5 Inner + 7 Middle + 7 Outter
20   1.38   138      - 3 Inner + 7 Middle + 10 Outter

 3 PSI Inner = TS-0505-2001 = BRN/BLK = 29mm OD, 32mm Length
 5 PSI Inner = TS-0505-2002 = BRN/GRY = 29mm OD, 36mm Length
 7 PSI Middle = TS-0505-2003 = BRN/PUR = 36.5 OD, 43mm Length
 11 PSI Middle = TS-0505-2004 = BRN/RED = 36.5 OD, 52mm Length
 10 PSI Outer = TS-0505-2005 = BRN/BLU = 44mm OD, 68mm
 7 PSI Outer = TS-0505-2006 = BRN/PNK = 44mm OD, 57mm

Tuesday, March 27, 2012

Z27AG Scrapping Wreck - Spare Parts

I picked up this wreck because one guy really needed to get rid of it. Engine has 40k km on it.
I plan to sell it pending on offers, otherwise i will forge it ^_^
- It has all its doors and glass except boot -  it has sideview mirrors
- rear tail lights / MAF / ECU
- lower control arms / axles / stock suspension / steering rack / tie rods
- gearbox and shifter / starter motor
- dash and various interior plastics


Friday, March 23, 2012

Stage 1 - Project Civic - EG with a B18C


a little project car i got.
its got a motor in it and some coilovers and exhaust with headers.
what i have planned...type R head with some ITBs...brakes...rims and tires....strip it a bit more


got some retro blue carpets...all gauges are removed, due to theft reasons. Car is pretty much empty. No stereo etc.
Some seat that i will spot weld in.
door trims will go. glass might go as well.


air duct/intake my mate made up. it use to have a NOS fogger intake kit for drags.
I believe i heard it ran 14.6 (not sure if this was with NOS or without)


 Cusco strut


Audi A3 KW Rear Suspension Install

Rears were easier. Removed the two bolts, had to use a hammer again to slide the bolt out.
Then the wishbone dropped.

Use the jack to help lift and align it all. It was tough getting the bolt back into the hub.

It goes in on an angle.


stock setup

18mm from the lower arm

21mm damper bottom bolt


Rear struts


Had to remove sound deadening panels to rear the rear tops they bolt off from the underside
Uses torx T25 then the 16mm two bolts holding the rear mount to the chassis.


KW variant installed. Finally!
They reuse both front and rear mounts.

Rear top damper bolt is 16mm

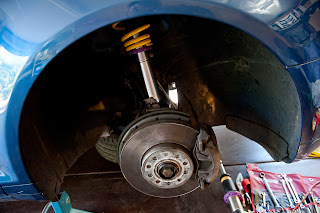
Audi A3 KW Front Suspension Install

Hmmm....Where do i start...
My friend asked me to help install some coilovers. I am confident in this stuff, but never worked on euro cars before. OMG. It took forever.
Complete hub disassembly, axle bolts, trying to split the strut/hub mount...Even the wipers were a bitch!

remove weather strip


A few tools that were a bit unordinary.
27mm axle nut, triple-square bolts (i used vice grips and a rattle gun to get this out).
You usual deep socket sets, hex set, tie rod splitters, an extra set of hands, rattle gun.

The pics didn't upload in any order @_@


- Splitting the tie rods, 18mm tie rod bolt


- Used a chisel to split the hub and a crap load of CRC
- 14mm 12point star bolt and 18mm nut

- disconnect ABS line and brake pad sensor


- axle was a bit stuck, so i bashed it out with a impact socket and rubber hammer

- 18mm nut connected strut to sway bar end link


# back breaking work!


- three 16mm bolts connect the ball joint to the lower arm


- scuffed the springs with my spring clamps.
what i didn't realise is you can completely unwind the coils and then tighten them up once you put the stock strut top onto the KW
- 21mm top mount bolt to remove the strut top


- Three bolts to remove the suspension top 13mm


13mm top strut tower bolts