the hobbies, struggles and travels of my life...
Saturday, September 21, 2013
RColt with Rays 57C Gram Lights 17x7.5 & 8.5 - I need a new daily wheel?
FIRST WORLD PROBLEMS
Want bigger brakes but at what cost!
Ok!
So I race with some 17x7.5 +30 and 17x8.5 +40, 2002 vintage wheels.
They run Hankook Z221 medium compound in 215/45 and 225/45
I also add a 25mm spacer to the fronts and a 10mm spacer on the rear :) H&R do a 67.1mm Centre bore spacer
Problem is, if i upgrade my rotor to anything bigger than i currently have I can't use my rota grids 15x8 +0 /rota-grid-15x8-0-z7ag.html
UPDATE: I am shocked my 294mm discs actually fit under the 15" wheels!
Solution 1: run my modified evo calipers with a 294mm disc on my track rims and switch them over to the 276mm rotor when i finish at the track. Its actually super easy to do.
I have a bracket to convert the twin pots to a 294mm disc ^_^
UPDATE: I am shocked my 294mm discs actually fit under the 15" wheels!
/z27ag-rcolt-mr307282-with-294mm-discs.html
Solution 2: upgrade my rims to something else. Why? Future proof myself if I ever change to brembos or the UCF30 calipers (min 16" wheel) /calipers-arrived-ucf30ls430-sumitomo.html
What would be ideal if i could find an exact copy of my current track rims.
Rims:
* 16" ENKEI RACING RS 2PC
- 16x8 Offset +32 4x114.3
* 16" RPF1
* 16"/17' SSR Professor
Thursday, September 19, 2013
Calipers Arrived - UCF30/LS430 Sumitomo 4pots
<- Toyota Celsior UCF30 or Lexus LS430 '00-'03 in USA, which i plan to run with some 1997 Mitsubishi 3000GT 314mm discs cross drilled for the Colt
Weight is 3.8kg each, no pads, lines or pin retainer
As seen here, it was always a plan of mine to try some /ls400ucf20-or-ls430ucf30-front-brake.html
Some of the weight i had, guess like horse power you can't really compare.
No idea if people weighed it with pads or without etc
And you can find multiple weights per caliper @_@, makes comparing really hard
To the right are the brembo caliper adapter :)
Another possible project
UCF30 = 3.8kg (weighed myself)
EVO8/9 brembo = 3.7kg
Ksport 8pot = 2.9kg
Z32 NA Iron= 4.4kg
Z32 TT Aluminium = 3.2kg
Z33 brembo = 4.0kg
R32 GTR 296mm x 32mm (4 pot sumitomo caliper) = 3.2kg
R33 GTS-T = 3.2kg
S14/S15 = 4.4kg
Wilwood Dynalite 4 pot = 1.46kg (no hardware)
Wilwood FNSL6R 6 pot = 2.2kg (no hardware)
/r32-gtr-z32-30mm-caliper-comparison-question-end.html
<- mr307282
What you see are my new 294mm discs DBA417 re-drilled to a 4x114.3. What a rip off a redrill costs, gotta teach myself how :)
However these are not for the UCF30, but they are for my special caliper adapters.
These discs have been awaiting fitment with the caliper adapter mr307282, as seen here long ago... /z27ag-rcolt-mr307282-with-294mm-discs.html
Trying to find a rebuild kit :( Saw this on ebay - Lexus LS Front Brake Caliper Repair Kit 4341
Model Type Year From Year To
LS 430 UCF30 Aug-00
All above models with standard SUMITOMO 4 x 43mm piston calipers
Models with SUMITOMO...
Lexus LS Yr-2000 UCF30 [2000-2006] Saloon Saloon 430 4293ccm 282HP 207KW (Petrol)
---Rotors - EVO 4 - DBA 417--- /project-mu-or-carbotech-276mm-or-294mm.html
Vent - Vented
Diameter - 294
Height - 46
Thickness - 24
Min Thickness - 22.4
Centre Hole Dia - 69
Bolt Holes - 5
DBA 4402XS - 4000 Series Crossdrilled Slotted
Vehicle fitment:
Lancer Evo 4 CN9A 09/96-02/98 Non brembo
Legnum VR-4 EC4W T/Turbo 08/96-on
Diamante/ Magna TJ, TL AWD V6 2003-on
-------------------------------- DBA Disc Comparison
Part No - Ventilation - Diameter - Height - Thick - Min Thick - CB - Studs - Shipping Weight kg
DBA 4402 - Vented - 276 - 45 - 24 - 22.4 - 69 - 4 - 6 * Evo III
DBA 4213 - Vented - 296 - 45.2 - 30 - 28.4 - 69 - 5 - 7 * Evo IV RS CN9A
DBA 4216 - Vented - 314 - 45.5 - 30 - 28.4 - 69 - 5 - 8.6 * GTO -
DBA X418 - Vented - 320 - 43.5 - 32 - 29.8 - 69 - 5 - * Evo Brembo non X
LEXUS LS430 UCF30 11/2000~08/2003 3UZFE 4293 cc V 8cyl
DBA 845 - Vented - 315 - 50.25 - 30 - 28 - 62 - 5
Other swaps using the Lexus Calipers:
http://944hybrids.forumotion.com/t7-ls430-big-brake-swap
http://mercedes-190.co.uk/topic/6698335/1/
http://www.clublexus.com/forums/suspension-and-brakes/97038-what-big-brake-kit-do-you-have-4.html
Wednesday, September 18, 2013
Diesel Cleaning & Bleeding Tappets/Lash Adjusters/Hydraulic lifters - MD171130 MD376687 - 4G15, 4G63 etc
LASH ADJUSTERS - Taken from the Mitsubishi Z27AG/4G15 Manual
CAUTION
• The lash adjuster is a precision-engineered component. Do not allow dust or other foreign matter to enter it.
• Do not disassemble lash adjusters.
• Use only non-contaminated diesel fuel to clean the lash adjuster.
1. Prepare three containers and approximately five liters of diesel fuel. Pour into each container the diesel fuel in an amount enough for a lash adjuster placed in the container in its upright
position to completely submerge.
2. Place the lash adjuster in container A and wash its outside surface.
NOTE: Use a nylon brush if there are hard-to-remove deposits.
CAUTION
The steel ball spring of the lash adjuster is extremely weak. The lash adjuster's functionality
may be badly affected if the special tool is inserted too strongly.
3. While gently pushing the internal steel ball using the special tool Air bleed wire (MD998442), move the plunger in and out 5 − 10 times to eliminate stiffness in the plunger and expel contaminated oil.
NOTE: The plunger must be free from jamming and any other abnormalities. If a defect is found in
plunger operation, replace the lash adjuster.
CAUTION
The hole in the side of the lash adjuster must be directed toward the inside of container A. Never
direct it against any person.
4. Take the lash adjuster out of the container, then move the plunger by pushing the steel ball gently to discharge the diesel fuel from the pressure chamber.
CAUTION
The steel ball spring of the lash adjuster is extremely weak. The lash adjuster's functionality
may be badly affected if the special tool is inserted too strongly.
5. Soak the lash adjuster in the diesel fuel in container B. Move the plunger in and out 5 − 10
times by gently pushing the internal steel ball using the special tool Air bleed wire (MD998442)
until the plunger moves smoothly to wash the lash adjusterís pressure chamber.
CAUTION
The hole in the side of the lash adjuster must be directed toward the inside of container B. Never
direct it against any person.
6. Take the lash adjuster out of the container, then move the plunger by pushing the steel ball gently to discharge the diesel fuel from the pressure chamber.
CAUTION
Do not use container C for cleaning. If cleaning is performed in container C, foreign matter could
enter the pressure chamber when the chamber is filled with diesel fuel.
7. Soak the lash adjuster in the diesel fuel in container C. Gently push the internal steel ball
using the special tool Air bleed wire (MD998442).
8. Place the lash adjuster upright with the plunger at the top. Push the plunger firmly until it makes a full stroke, then return the plunger slowly and release the hold of the steel ball to allow the pressure chamber to be filled with diesel fuel.
9. Take the lash adjuster out of the container, place it upright with the plunger at the top, and push the plunger firmly. The plunger must not move at all.
NOTE: If the lash adjuster contracts, perform the operations 7 through 9 again. Replace the lash
adjuster if it still contracts even after the pressure chamber has completely been filled with diesel
fuel (air has been bled).
10.Keep the serviced lash adjusters in their upright positions to prevent diesel fuel from spilling out. Protect them from dust or other foreign matter. Install the lash adjusters onto the engine as soon as possible.
Compatible Models (according to camskill.co.uk)
CA3A CB3A MIRAGE/LANCER 4G91 DOHC
CA4A MIRAGE 4G92 DOHC (NON MIVEC)
CB6A MIRAGE/LANCER 6A10 DOHC
CD5A CD5W LANCER/LIBERO 4G93 DOHC TURBO
CJ2A CK2A MIRAGE/LANCER 4G15 DOHC
CM5A MIRAGE/LANCER 4G93 DOHC TURBO
CQ2A CS2A MIRAGE/LANCER 4G15 DOHC
CQ5A CS5A MIRAGE/LANCER 4G93 DOHC
CU4W AIRTRECK 4G64 DOHC
DA2A CARISMA 4G93 DOHC
DE3A FTO 6A12 DOHC (NON MIVEC)
E52A GALANT 4G93 DOHC
E54A E64A E74A E84A GALANT 6A12 DOHC
EA1A EC1A EA1W EC1W GALANT/LEGNUM 4G93 DOHC
EA3A EC3A EA3W EC3W GALANT/LEGNUM 4G64 DOHC
EA7A EC7A EA7W EC7W GALANT/LEGNUM 4G94 DOHC
EC5A EA5W EC5W GALANT/LEGNUM 6A13 DOHC
F36A F46A DIAMANTE 6G72 SOHC
N61W N71W RVR 4G93 DOHC
N64WG N74WG RVR 4G64 DOHC
N84W N94W CHARIOT 4G64 DOHC
S33A S43A PROUDIA 8A80 DOHC
Z25A Z26A COLT 4G19 DOHC MIVEC
Z27A Z28A COLT 4G15 DOHC MIVEC
Notes 1 These are 3mm hole type
Part # MD376687 MD377239 MD171130 MD359419
CAUTION
• The lash adjuster is a precision-engineered component. Do not allow dust or other foreign matter to enter it.
• Do not disassemble lash adjusters.
• Use only non-contaminated diesel fuel to clean the lash adjuster.
1. Prepare three containers and approximately five liters of diesel fuel. Pour into each container the diesel fuel in an amount enough for a lash adjuster placed in the container in its upright
position to completely submerge.
2. Place the lash adjuster in container A and wash its outside surface.
NOTE: Use a nylon brush if there are hard-to-remove deposits.
CAUTION
The steel ball spring of the lash adjuster is extremely weak. The lash adjuster's functionality
may be badly affected if the special tool is inserted too strongly.
3. While gently pushing the internal steel ball using the special tool Air bleed wire (MD998442), move the plunger in and out 5 − 10 times to eliminate stiffness in the plunger and expel contaminated oil.
NOTE: The plunger must be free from jamming and any other abnormalities. If a defect is found in
plunger operation, replace the lash adjuster.
CAUTION
The hole in the side of the lash adjuster must be directed toward the inside of container A. Never
direct it against any person.
4. Take the lash adjuster out of the container, then move the plunger by pushing the steel ball gently to discharge the diesel fuel from the pressure chamber.
CAUTION
The steel ball spring of the lash adjuster is extremely weak. The lash adjuster's functionality
may be badly affected if the special tool is inserted too strongly.
5. Soak the lash adjuster in the diesel fuel in container B. Move the plunger in and out 5 − 10
times by gently pushing the internal steel ball using the special tool Air bleed wire (MD998442)
until the plunger moves smoothly to wash the lash adjusterís pressure chamber.
CAUTION
The hole in the side of the lash adjuster must be directed toward the inside of container B. Never
direct it against any person.
6. Take the lash adjuster out of the container, then move the plunger by pushing the steel ball gently to discharge the diesel fuel from the pressure chamber.
CAUTION
Do not use container C for cleaning. If cleaning is performed in container C, foreign matter could
enter the pressure chamber when the chamber is filled with diesel fuel.
7. Soak the lash adjuster in the diesel fuel in container C. Gently push the internal steel ball
using the special tool Air bleed wire (MD998442).
8. Place the lash adjuster upright with the plunger at the top. Push the plunger firmly until it makes a full stroke, then return the plunger slowly and release the hold of the steel ball to allow the pressure chamber to be filled with diesel fuel.
9. Take the lash adjuster out of the container, place it upright with the plunger at the top, and push the plunger firmly. The plunger must not move at all.
NOTE: If the lash adjuster contracts, perform the operations 7 through 9 again. Replace the lash
adjuster if it still contracts even after the pressure chamber has completely been filled with diesel
fuel (air has been bled).
10.Keep the serviced lash adjusters in their upright positions to prevent diesel fuel from spilling out. Protect them from dust or other foreign matter. Install the lash adjusters onto the engine as soon as possible.
Compatible Models (according to camskill.co.uk)
CA3A CB3A MIRAGE/LANCER 4G91 DOHC
CA4A MIRAGE 4G92 DOHC (NON MIVEC)
CB6A MIRAGE/LANCER 6A10 DOHC
CD5A CD5W LANCER/LIBERO 4G93 DOHC TURBO
CJ2A CK2A MIRAGE/LANCER 4G15 DOHC
CM5A MIRAGE/LANCER 4G93 DOHC TURBO
CQ2A CS2A MIRAGE/LANCER 4G15 DOHC
CQ5A CS5A MIRAGE/LANCER 4G93 DOHC
CU4W AIRTRECK 4G64 DOHC
DA2A CARISMA 4G93 DOHC
DE3A FTO 6A12 DOHC (NON MIVEC)
E52A GALANT 4G93 DOHC
E54A E64A E74A E84A GALANT 6A12 DOHC
EA1A EC1A EA1W EC1W GALANT/LEGNUM 4G93 DOHC
EA3A EC3A EA3W EC3W GALANT/LEGNUM 4G64 DOHC
EA7A EC7A EA7W EC7W GALANT/LEGNUM 4G94 DOHC
EC5A EA5W EC5W GALANT/LEGNUM 6A13 DOHC
F36A F46A DIAMANTE 6G72 SOHC
N61W N71W RVR 4G93 DOHC
N64WG N74WG RVR 4G64 DOHC
N84W N94W CHARIOT 4G64 DOHC
S33A S43A PROUDIA 8A80 DOHC
Z25A Z26A COLT 4G19 DOHC MIVEC
Z27A Z28A COLT 4G15 DOHC MIVEC
Notes 1 These are 3mm hole type
Part # MD376687 MD377239 MD171130 MD359419
Monday, September 16, 2013
Big End Oil Clearance & Crank Endplay - Colt Turbo 4G15 - Updated Build Measurements
Got a chance to play with the block again.
With a new magnetic stand i got i was able to check the crankshaft endplay. It was within spec.
I also cleaned the bored about 5 times as i wasn't too happy with them.
These are all the current build measurements. I had to update them due to the crank getting a regrind.
Most of the time was spent on stretching rod bolts and testing oil clearance on the big end.
How to Use the Stretch Gauge
Big end clearance>
< Crankshaft endplay
High Performance Piston Rings
Top Ring : 1mm Alloy Steel / Gas Nitrated
2nd Ring : 1.2mm Cast Iron / Napier Hook
Bore : 76.5mm
Oil Ring : 3/16 3-Piece Std Tension
Size : .039-.047-2.8mm
76.5mm x 1.0x1.2x2.8mm Ring Set
Gapping I Completed Earlier
Wiseco Piston Rings 7650XX - /Manuals/RingEndGap.pdf.
I did plan to install the pistons and rings but my ring compressor was a bit gay.
It would turn the rings as I compressed them.
Friday, September 6, 2013
My Giant STP Pro - Rockshox Pike 454 air U-turn fork Rebuild
Bought a hard trail bike after watching Where the Trail Ends
I also plan to ride to work and possible plan a holiday with a bike e.g. riding over Japan etc
I found a second hand STP Pro (2008), why this model? Gotta start somewhere.
Condition wasn't too bad. Price wasn't bad.
Like anything i buy i gotta make sure its in good order.
Striped the derailleur and cleaned it, pull apart the fork, brake bleed, new brake pads and planning on install break rotors.
Rebuilding the suspension was a huge task.
-------------- Bike Details --------------
The ultimate combination of strength and light weight. When the call went out to create the HERO model of our ever popular STP series the criteria was simple; take our proven HandMade ALUXX alloy frame and combine with a no compromise spec carefully balancing weight and strength. Highlights include Rockshox Pike 454air with U-turn Adjust, Shimano Saint Hollowtech II crankset, DTswiss/Mavic wheelset and Avid Juicy brakeset. I’m sure you will agree all that’s left to do is ride..
Below is a manual and various video links.
Suspension Service Manual
UPGRADES OVER STP 0
Rockshox Pike 454 air U-turn fork
Shimano XT/Deore drivetrain
Shimano SAINT crankset
Avid Juicy 5 brakeset
DT Swiss/Mavic wheelset
Shimano DX pedals
Raceface Diablous bar & D2 stem
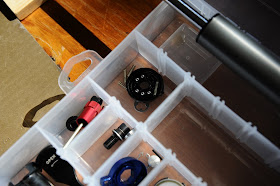
I needed to buy a whole bunch of crap lol. There wasn't a one stop kit i could find
Start @ Lower Leg Removal
1) RockShox Reba/Revo/Pike Air UTurn Service Kit $32US
Manufacturer Part#: 11.4015.263.000
Item Description
RockShox Service Kits.
Service kits include o-rings, glide rings, air valve caps, air valves, c-clips, bottom out bumpers, crush washer, etc. Kits include many extra parts to cover all years and models.
Service kits do not include dust wipers (main seals) or bushings
Fits: 05-08 Reba/06-09 Recon/06-09 Revelation/05-10 Pike Air U-turn
Mission Control (similar to the 454)
2) RockShox Reba/Recon/Revo/Pike Motion Control Service Kit $23US
Service On Youtube
Service kits include o-rings, glide rings, air valve caps, air valves, c-clips, bottom out bumpers, crush washer, etc. Kits include many extra parts to cover all years and models.
Service kits do not include dust wipers (main seals) or bushings
Fits: 05-08 Reba/06-09 Recon/06-09 Revelation/05-10 Pike Motion Control
3) RockShox 32mm Seal Kit 05-08 Reba/Pike/09 Revelation $32US
OEM Part # 11.4308.850.000
Then i need two types of oil for the shocks Manual Oil
4) pike 454 air u-turn oil
- damper technology (right leg) - motion control
> upper leg - volume (cc/ml) oil wt
> 120ml / 5w
> lower leg - volume (cc/ml) oil wt
> 15ml / 15w
- spring technology (left leg) - air u-turn
> upper leg - volume (cc/ml) oil wt
> N/A
> lower leg - volume (cc/ml) oil wt
> 15ml / 15w
Movies Videos
SIZE regular:13.5, large:14.5
COLOURS White
FRAME ALUXX alloy: double butted, integrated gusset w/CNC BB yoke
FORK Rockshox Pike 454 Air U-Turn w/maxle
REAR DERAILLEUR Shimano XT Shadow high normal 9 speed
FRONT DERAILLEUR
SHIFTERS Shimano Deore rapid fire 9 speed
CRANKSET Shimano Saint Hollowtech II 34T
BOTTOM BRACKET Shimano Saint integrated, outboard
SHIFT/CHAIN GUIDE E-13 STS Chain Guide with custom bashguard
CHAIN Shimano HG73 9speed
CASSETTE SRAM PG970 11-23
BRAKES Avid Juicy 5 hydraulic w/6" rotors
BRAKE LEVERS Avid Juicy 5 hydraulic
HUBS Fr: DT 370 20mm / Rr: DT 370 9speed cassette disc
RIMS Mavic EX729 disc 26" x 32H welded w/eyelets
SPOKES DT Swiss 14G stainless
TYRES Maxxis Holly Roller 2.4"
PEDALS Shimano DX (MX30) platform
H.BAR/STEM Raceface Diablous 31.8mm low ris/ Raceface Diablous D2
SEAT POST SDG I Beam 30.9 freestyle
SADDLE SDG I Sky freestyle
GRIPS Giant lock-on metal
EXTRAS